please dont rip this site

AOLpress Logo

Creating pages

Adding images to pages
To jazz up your pages, you can add images. In fact, images aren't just for making pages attractive. Remember that "a picture is worth a thousand words". Well, if you use the right picture it can be -- and a lot more interesting than reading a thousand words!

Of course, you should keep in mind the connection speeds your target readers probably have and make sure the file sizes of your images are reasonable.

Images: [ Adding images | File locations | Alignment |
Alternate Text | Resizing | Horizontal rules | Colors and Background images ]


Adding images

The first step is to learn how to add an image to a page. We'll get into the details after learning the simplest case.

  1. Place the cursor in the yellow space to the right.
  2. Choose ElementImage. You'll see the Image window, which lets you choose the image you want to insert. (Don't worry about all the fields right now. We'll explain them as you continue through this page.)
  3. Click the Browse button to the right of the Location field.
  4. Find the directory that holds the tutorial files. For example, if you installed AOLpress in the c:\aolpress directory, find the c:\aolpress\help\tutorial directory.
  5. Select the yosemite.gif file and click OK. You'll see a drawing of Yosemite Falls.
   Try it here:
You can also highlight and copy images from any page on the Web (with EditCopy) and paste them into your pages (with EditPaste). Be aware that you shouldn't use images this way unless you have permission from the person who created the image.


More about file locations

When you insert an image into a page, the image file doesn't really become part of the page. Instead, the page contains a link to the file. You'll want to make sure that you insert images so they can still be found when you publish your page to the Web.

Here are some details about how to make sure that your pages are correctly linked to images you import from various places.

  • If your page is stored on your computer:
    • If the image is on a different disk than the page, the image file will be copied to the directory you are working in. (The Import Image field will be checked in the Image window, and you won't be allowed to uncheck it.)
    • If the image is in a different directory on the same disk, the Location of the image in the Image window will begin with "/" or "../". This means it is a "relative reference" to another directory.
      • If the directory containing the image will also be part of your Web site, you can leave it as a relative reference. (You should use the same names and organization for Web page directories on your computer and on your Web site. For example, you may want to put all your images in a subdirectory called "images" of the directory for your pages.)
      • If the directory that contains the image will not be part of your Web site, check the Import Image field in the Image window. This will copy the image to the same directory as your page.
    • If the image is on the Web, the Location of the image in the Image window will use the full URL to find the file on the Web. You can copy the file to your own computer by checking the Import Image field.
  • If your page is stored on a Web server:
    • If the image is stored on your computer, the image file will be imported to the directory you are working in. (The Import Image field will be checked in the Image window, and you won't be allowed to uncheck it.)
    • If the image is on the same Web server, the Location of the image in the Image window will begin with "/" or "../". This means it is a "relative reference" to another directory. You can click the Absolutize button to make this an "absolute reference".
    • If the image is on another Web server, the Location of the image in the Image window will use an absolute reference to the file in its current location. You can copy the file to your own Web server and link to it there by checking the Import Image field.


Image alignment

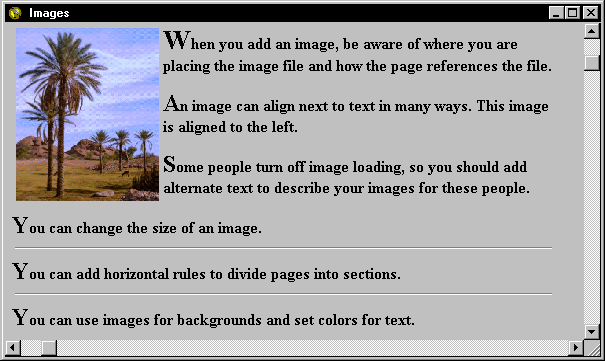
When we imported the Yosemite image, we didn't worry about how it lined up with the text. You actually have a lot of control over image and text alignment. You can choose any of these formats:


Top


Middle

Bottom


Left


Right

  1. Use your mouse to highlight the marble tile image to the right.
  2. Choose ElementImage. You'll see the Image window again. It shows the name of the image.
  3. Choose any of the other settings for alignment and click OK. The text will align next to the image as shown above.
  4. Highlight the image by dragging your mouse or by double-clicking on the image. (Don't worry if you selected any text along with the image.)
  5. Choose ElementImage.
  6. Play with the other image alignment options. (You can use EditUndo to remove your latest changes, or you can click the toolbar button to reload the saved version of the page.)
   Try it here:
Looking for a good background image for your pages? You can find plenty of them on the Web. Try PrimeHost's collection of links to clip art on the Web. Make sure that the text colors you use show up against the background image. We'll talk about how to add background images to your pages later on this page.


Alternate text

Some people browse the Web with browsers that can't display images. Others set their browsers to only load images they click on. If you want to get your message across to these people, you should provide text they can see when they don't display the image.

  1. Highlight the home image to the right and choose ElementImage.
  2. In the "Description" field, type "[ Home ]". (The brackets make it easier to tell text for images apart from regular text on some browsers.)
  3. Click OK. That's all you have to do to create alternate text for an image.
   Try it here:
Do your part to make downloading images faster for visitors to your Web site. Keep the image file sizes reasonable by making the images smaller or by restricting the number of colors in the image.


Resizing images

You can stretch or reduce your images easily with AOLpress. Resizing the image on your pages doesn't affect the image file itself, so you can use the same image at different sizes in your pages.

  1. Double-click on the image of "Download Dog" to the right. You'll see resizing handles to the right and bottom of the image.
  2. Drag the handles to resize the image.
  3. If you want to change the width and height proportionally, hold down the Shift key and drag the handle in the lower-right corner.
  4. To reset the image back to its real size, choose ElementImage, remove the numbers from the Width and Height fields, and click OK. (Or, you can press Ctrl + Z several times to undo your recent actions.)
   Try it here:
By the way, when you add an image to a page, AOLpress automatically writes the width and height information to the HTML it creates. In addition to letting you resize images, this size information allows visitors to start scrolling through your pages while the images are still loading.


Horizontal rules

The line above is a "horizontal rule" instead of an actual image. You can use images as rules if you want to get fancy. In this section, you'll learn to create basic rules.

  1. Put your cursor in the space to the right and choose ElementHorizontal Rule. You'll see a rule that stretches across the width of the table cell.
  2. You can put horizontal rules in other places. They normally stretch across the width of the page when they are not inside a table.
   Try it here:


Setting page colors and backgrounds

You've probably seen pages with many different colors and a variety of background patterns. It's easy to make changes like this to your pages with AOLpress.

   Try it here:
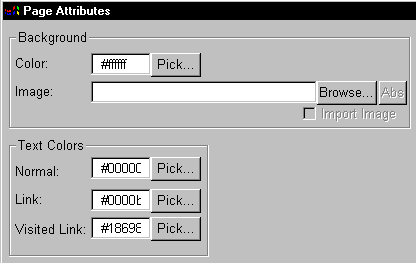
  1. Choose FormatPage Attributes. You'll see a window that lets you control a variety of things that affect the whole page.
  2. Click the "Pick..." button next to one of the fields shown here.
  3. Choose the color you want to use and click OK. The code you see in the field (such as, #800080) is an RGB (red-green-blue) code for the color.
  4. You can pick new colors for all four fields. Click OK if you want to see what the page looks like with your colors.
  5. Choose FormatPage Attributes again.
  6. Now, click the "Browse..." button to the right of the Image field. Find the marble2c.gif file in the same directory that holds these tutorial pages. Click OK in both windows to see a marble background for this page.


For more information, see the chapter on images in the AOLpress User's Guide.

In the next lesson you'll learn how to create links between pages. In fact, you'll be able to link images to other locations and create image maps with links to several places (like the one near the top of this page). Don't forget to choose FileSave to save your changes to this page.


HomeTOCNextGlossaryIndex
[ Home | Contents | Previous | Up a Level | Next | Glossary | Index ]
Copyright © 1997 America Online, Inc.

file: /Techref/language/html/HELP/tutorial/images.htm, 18KB, , updated: 1997/3/23 17:29, local time: 2024/12/21 07:51,
TOP NEW HELP FIND: 
18.216.208.73:LOG IN

 ©2024 These pages are served without commercial sponsorship. (No popup ads, etc...).Bandwidth abuse increases hosting cost forcing sponsorship or shutdown. This server aggressively defends against automated copying for any reason including offline viewing, duplication, etc... Please respect this requirement and DO NOT RIP THIS SITE. Questions?
Please DO link to this page! Digg it! / MAKE!

<A HREF="http://massmind.org/techref/language/html/HELP/tutorial/images.htm"> AOLpress: Adding images to pages</A>

After you find an appropriate page, you are invited to your to this massmind site! (posts will be visible only to you before review) Just type a nice message (short messages are blocked as spam) in the box and press the Post button. (HTML welcomed, but not the <A tag: Instead, use the link box to link to another page. A tutorial is available Members can login to post directly, become page editors, and be credited for their posts.


Link? Put it here: 
if you want a response, please enter your email address: 
Attn spammers: All posts are reviewed before being made visible to anyone other than the poster.
Did you find what you needed?


Welcome to massmind.org!


Welcome to massmind.org!


  .